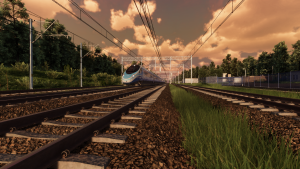
Скоростной электропоезд ED250 Pendolino
Страница посвящена электропоезду ED 250 / Pendolino.

Подвижной состав в реальности
30 мая 2011 года Польские государственные железные дороги PKP подписали контракт с компанией Alstom на поставку 20 поездов Pendolino ETR 610. Эти новые поезда, известные как Pendolino ED250, были приобретены с намерением эксплуатировать их на нескольких основных магистральных маршрутах, в том числе между Гдыней и Варшавой, на высокоскоростной линии CMK Central Rail Line от Кракова/Катовице до Варшавы и от Вроцлава до Варшавы. 12 августа 2013 года был поставлен первый поезд ETR 610.
Высокоскоростные испытания нового состава проходили в основном на центральной железнодорожной линии CMK; 16 ноября, в первый день испытаний, Pendolino развил скорость 242 км/час. 17 ноября 2013 года был установлен новый рекорд скорости Польских железных дорог, когда Pendolino ED250 развил скорость 291 км/ч, побив предыдущий рекорд в 250,1 км/ч, установленный 19 лет назад. 24 ноября 2013 года, в последний день испытаний на центральной железнодорожной линии CMK, Pendolino развил скорость 293 км/ч.
Название Пендолино используется для идентификации серии высокоскоростных поездов с наклоняющимся кузовом, произведенных в Италии. Своим названием (на итальянском языке pendolino может означать "маленький маятник") эти поезда обязаны механизму, позволяющему им наклоняться во время поворота. Максимальный угол наклона в 8 градусов позволяет поездам развивать скорость на 35% выше, чем у обычных поездов, оставаясь при этом комфортными для пассажиров.[1]
В игре

Электропоезд впервые был добавлен в Раннем Доступе, на данный момент курсирует по маршрутам Катовице-Варшава, и Варшава-Краков (на момент написания статьи 26.03.2023 маршрут кончается на станции Туннель).
Серийные номера доступные к поездке:
- ED250-018
Базовые характеристики
- Максимальная скорость в игре 200 км/ч
Интерьер и органы управления

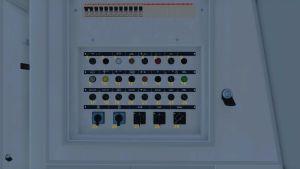
| 1. | Battery | 16. | n/a |
| 2. | n/a | 17. | Bypass MCB |
| 3. | Corridor lighting | 18. | Bypass TCO |
| 4. | Reset EVC/TELOC | 19. | Disable emergency brake |
| 5. | Bypas harmonic measurements A | 20. | Disable radiostop |
| 6. | n/a | 21. | Disable SIFA |
| 7. | Bypas harmonic measurements B | 22. | Disable NOTHALT |
| 8. | n/a | 23. | Disable LZB |
| 9. | Battery powered headlights | 24. | Disable PZB |
| 10. | Emergency ventilation | 25. | Light mode |
| 11. | Passenger compartment lighting | 26. | Light mode rear |
| 12. | Reset computer | 27. | Disable EVC |
| 13. | SIFA test | 28. | Disable SHP |
| 14. | LV board controls test | 29. | Disable MIREL |
| 15. | Brakes test |

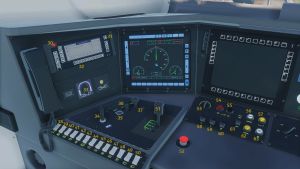
| 30. | Radiostop | 47. | Cab lighting |
| 31. | Radio power switch | 48. | Headlamp top |
| 32. | ZEW buttons | 49. | Lights far |
| 33. | Decouple | 50. | Light dimming |
| 34. | Horn | 51. | Cruise control handle |
| 35. | LZB command | 52. | SHP button |
| 36. | Release LZB | 53. | Cabin activation |
| 37. | LZB alerter | 54. | Open main switch |
| 38. | Sanding | 55. | Close main switch |
| 39. | Roller blind | 56. | Booster |
| 40. | Control panel lighting | 57. | Neutral section |
| 41. | Driver´s spotlight | 58. | Pantograph front |
| 42. | Controls test | 59. | Pantograph back |
| 43. | Footrest adjustment | 60. | Force compressors |
| 44. | Washer | 61. | Control circuits |
| 45. | Wiper | 62. | Parking |
| 46. | Windscreen heating | 63. | Forbid EDB (Electrodynamic braking) |

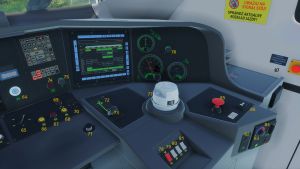
| 64. | Farlight impulse | 76. | Signal lights dimming |
| 65. | Voltage selector | 77. | Service brake |
| 66. | Open left doors | 78. | Spring brake |
| 67. | Close doors | 79. | Bypass emergency brake |
| 68. | Open right doors | 80. | Air recirculation |
| 69. | Alarm | 81. | Assistatnt spotlight |
| 70. | Coupler cover | 82. | AC |
| 71. | Vigilance button | 83. | Temperature |
| 72. | Direction control | 84. | Fan speed |
| 73. | Drive handle | 85. | Emergency brake |
| 74. | Error acknowiedge | 86. | Horn (low) |
| 75. | Pulpit lights dimming | 87. | Vigilance button |
Cold start procedure
- Click on the door and select the option to open the door.
- Then enter the unit.
- Click the left mouse button and close the door.
- On the panel, turn on the batteries, the car lights and select the lights.
- Click on the driver's seat, sit behind the console.
- Now, activate the cab
- Confirm vigilance button
- Raise the rear pick-up
- Turn on the control circuits
- Turn on HV (main switch)
- Now wait for the panel to read "12A"
- Confirm to the dispatcher that the train is ready by pressing the ZEW3 button on the radio.
- Set the train direction - Forward
- Move the brake lever to the "Running" position and wait for the train to unbraking (Brake force must be 0%)
- Switch off the spring brake
- Now it's time to move. Either use the controller (right) or the Num + key to add power.
- At the stations we must not forget the possibility of opening the passenger door, which is visible at 04:26
- Press the open left door button and let the passengers board the train.
- After the passengers have finished boarding, we press the door lock button and we can leave the station.
Unit faults
The unit is currently free of any malfunctions.
Gallery
- Screenshots from the game (without zoom)
-
Pendolino, Author Roman
-
Pendolino, Author Zahoracka
-
Pendolino, Author Roman
-
Pendolino, Author Smokey
-
Pendolino, Author Adameqq
Reference
- [1] - Wikipedia link


