Automotor eléctrico ED250 Pendolino
The following article is about the ED 250 / Pendolino electric unit.

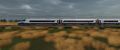
Unit in reality
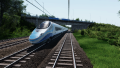
On 30 May 2011, the Polish State Railways PKP signed a contract with Alstom for 20 Pendolino ETR 610 trains. These new trains, known as Pendolino ED250, were purchased with the intention of operating them on several major backbone routes, including between Gdynia and Warsaw, on the CMK Central Rail Line high-speed line from Kraków/Katovice to Warsaw and from Wrocław to Warsaw. On 12 August 2013, the first ETR 610 train was delivered.
The high-speed tests with the new train set took place largely on the CMK central railway line; on 16 November, the first day of the tests, the Pendolino reached a speed of 242 km/h. On 17 November 2013, a new Polish Railways speed record was set when the Pendolino ED250 reached a speed of 291 km/h, breaking the previous record of 250.1 km/h (155.4 mph) set 19 years earlier. On 24 November 2013, on the last day of testing on the CMK central railway line, the Pendolino reached a speed of 293 km/h.[1]
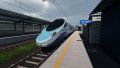
Unit in the game

The unit was first added to the game during the Early Access (EA) release and currently runs Katowice-Warsaw and Warsaw-Cracow (currently the end of the ride is after Tunnel station)'.
Serial numbers of unit that can be driven:
- ED250-018
Basic parameters of this unit
- Maximum speed 200Km/h
Interior of the locomotive

| 1. | Battery | 16. | n/a |
| 2. | n/a | 17. | Bypass MCB |
| 3. | Corridor lighting | 18. | Bypass TCO |
| 4. | Reset EVC/TELOC | 19. | Disable emergency brake |
| 5. | Bypas harmonic measurements A | 20. | Disable radiostop |
| 6. | n/a | 21. | Disable SIFA |
| 7. | Bypas harmonic measurements B | 22. | Disable NOTHALT |
| 8. | n/a | 23. | Disable LZB |
| 9. | Battery powered headlights | 24. | Disable PZB |
| 10. | Emergency ventilation | 25. | Light mode |
| 11. | Passenger compartment lighting | 26. | Light mode rear |
| 12. | Reset computer | 27. | Disable EVC |
| 13. | SIFA test | 28. | Disable SHP |
| 14. | LV board controls test | 29. | Disable MIREL |
| 15. | Brakes test |

| 30. | Radiostop | 47. | Cab lighting |
| 31. | Radio power switch | 48. | Headlamp top |
| 32. | ZEW buttons | 49. | Lights far |
| 33. | Decouple | 50. | Light dimming |
| 34. | Horn | 51. | Cruise control handle |
| 35. | LZB command | 52. | SHP button |
| 36. | Release LZB | 53. | Cabin activation |
| 37. | LZB alerter | 54. | Open main switch |
| 38. | Sanding | 55. | Close main switch |
| 39. | Roller blind | 56. | Booster |
| 40. | Control panel lighting | 57. | Neutral section |
| 41. | Driver´s spotlight | 58. | Pantograph front |
| 42. | Controls test | 59. | Pantograph back |
| 43. | Footrest adjustment | 60. | Force compressors |
| 44. | Washer | 61. | Control circuits |
| 45. | Wiper | 62. | Parking |
| 46. | Windscreen heating | 63. | Forbid EDB (Electrodynamic braking) |

| 64. | Farlight impulse | 76. | Signal lights dimming |
| 65. | Voltage selector | 77. | Service brake |
| 66. | Open left doors | 78. | Spring brake |
| 67. | Close doors | 79. | Bypass emergency brake |
| 68. | Open right doors | 80. | Air recirculation |
| 69. | Alarm | 81. | Assistatnt spotlight |
| 70. | Coupler cover | 82. | AC |
| 71. | Vigilance button | 83. | Temperature |
| 72. | Direction control | 84. | Fan speed |
| 73. | Drive handle | 85. | Emergency brake |
| 74. | Error acknowiedge | 86. | Horn (low) |
| 75. | Pulpit lights dimming | 87. | Vigilance button |
Cold start procedure
- Click on the door and select the option to open the door.
- Then enter the unit.
- Click the left mouse button and close the door.
- On the panel, turn on the batteries, the car lights and select the lights.
- Click on the driver's seat, sit behind the console.
- Now, activate the cab
- Confirm vigilance button
- Raise the rear pick-up
- Turn on the control circuits
- Turn on HV (main switch)
- Now wait for the panel to read "12A"
- Confirm to the dispatcher that the train is ready by pressing the ZEW3 button on the radio.
- Set the train direction - Forward
- Move the brake lever to the "Running" position and wait for the train to unbraking (Brake force must be 0%)
- Switch off the spring brake
- Now it's time to move. Either use the controller (right) or the Num + key to add power.
- At the stations we must not forget the possibility of opening the passenger door, which is visible at 04:26
- Press the open left door button and let the passengers board the train.
- After the passengers have finished boarding, we press the door lock button and we can leave the station.
Unit faults
The unit is currently free of any malfunctions.
Gallery
- Screenshots from the game (without zoom)
-
 Pendolino, Author Roman
 -
 Pendolino, Author Zahoracka
 -
 Pendolino, Author Roman
 -
 Pendolino, Author Smokey
 -
 Pendolino, Author Adameqq


Reference
- [1] - Wikipedia link